
Learning how to pave a driveway can transform your property’s curb appeal while adding significant value to your home. Whether you’re replacing an old, cracked surface or installing a brand-new driveway, understanding the complete process helps you make informed decisions about materials, contractors, and timing. With the right planning and execution, your new driveway will provide decades of reliable service while creating a stunning first impression for visitors and potential buyers alike.
Understanding Your Driveway Paving Options
Before starting any project, you need to choose the right material for your specific needs and budget. The driveway paving process varies significantly depending on your selected material, each offering distinct advantages and considerations.
Asphalt Driveways: The Popular Choice
Asphalt remains the most popular choice for residential driveways, offering an excellent balance of durability and affordability. Recent industry data shows that 73% of homeowners prefer asphalt for its flexibility during freeze-thaw cycles and relatively quick installation process. A properly installed asphalt driveway typically lasts 15-20 years with regular maintenance and costs between $7-15 per square foot including installation.
The dark surface naturally absorbs heat from sunlight, helping melt snow and ice faster than other materials. This makes asphalt particularly valuable in colder climates where winter weather poses ongoing challenges. However, asphalt does require sealing every 3-5 years to maintain its protective properties and appearance.
Concrete Driveways: Long-Term Investment
Concrete driveways offer superior longevity, lasting 30-50 years when properly installed and maintained. While the initial cost ranges from $6-12 per square foot, the extended lifespan often makes concrete more economical over time. Modern concrete options include stamped patterns and color additives that can mimic natural stone or brick at a fraction of the cost.
The main drawback of concrete is its susceptibility to cracking in areas with significant freeze-thaw cycles. However, proper installation with control joints and adequate base preparation can minimize these issues.
Paver Driveways: Premium Aesthetics
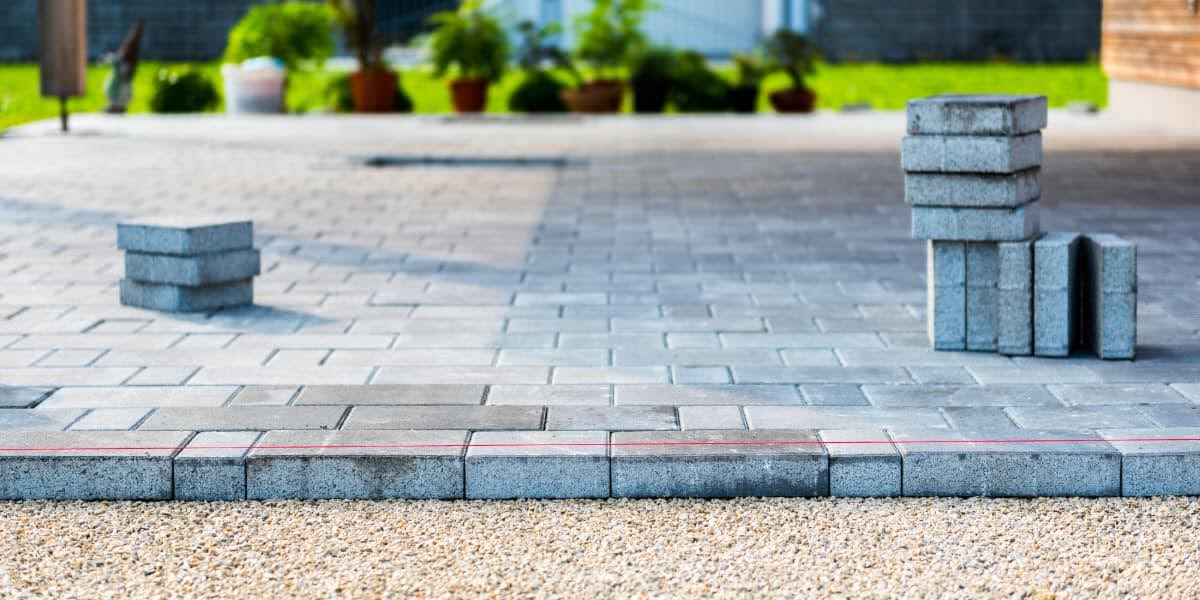
Paver driveways represent the premium option, with costs ranging from $10-50 per square foot depending on material choice. Current trends for 2025 show increasing demand for large-format pavers that create clean, modern lines with minimal joint spacing. Natural stone, concrete, and brick pavers each offer unique aesthetic benefits while providing excellent durability.
The major advantage of pavers is their repairability – individual units can be replaced without disturbing the entire surface. They also offer superior drainage when installed with permeable options, which are becoming increasingly popular for environmental reasons.
Site Assessment and Planning
Evaluating Your Current Driveway
The driveway paving process begins with a thorough assessment of your existing conditions. Look for signs that indicate the need for complete replacement rather than simple repairs:
- Alligator cracking (interconnected cracks resembling reptile skin) indicates base failure
- Extensive settling or uneven surfaces suggest drainage problems
- Multiple potholes throughout the surface show structural deterioration
- Poor drainage leading to standing water or ice buildup
If your current driveway shows only minor surface cracks or isolated damage, you might be able to use it as a base for new paving. However, structural issues require complete removal and replacement to avoid future problems.
Measuring and Design Considerations
Standard residential driveways measure 12-20 feet wide and 20-30 feet long, accommodating two vehicles comfortably. However, your specific needs might require different dimensions. Consider these factors when planning:
Width Requirements:
- Single car: 10-12 feet minimum
- Two cars side-by-side: 20-24 feet
- Turning space: Add 3-5 feet for easier maneuvering
Length Considerations:
- Standard car: 18-20 feet
- Truck or SUV: 22-25 feet
- Additional storage: Add 5-10 feet for lawn equipment or recreational vehicles
Drainage and Slope Requirements
Proper drainage is absolutely critical for long-term driveway performance. Industry best practices recommend a minimum slope of 1-2% (approximately 1/4 inch per foot) away from your home and garage. This seemingly small detail prevents water from pooling on the surface or flowing toward your foundation.
Areas with poor natural drainage may require additional solutions such as:
- French drains along the driveway edges
- Permeable paving materials that allow water infiltration
- Catch basins to collect and redirect surface water
- Swales or ditches to channel runoff away from the property
Step-by-Step Installation Process
Phase 1: Excavation and Site Preparation
The foundation of any successful driveway project lies in proper site preparation. This phase typically accounts for 30-40% of the total project timeline but determines the long-term performance of your investment.
Clearing and Demolition
Professional crews begin by removing existing pavement, vegetation, and debris from the work area. If your old driveway is salvageable, portions might be recycled as base material – an environmentally friendly practice that can reduce project costs by 10-15%.
The excavation depth depends on your chosen material and local soil conditions. Standard requirements call for:
- Asphalt: 8-12 inches total depth (4-6 inches base + 2-4 inches asphalt)
- Concrete: 6-10 inches total depth (4-6 inches base + 4 inches concrete)
- Pavers: 10-14 inches total depth (6-8 inches base + 2-4 inches sand + paver thickness)
Soil Stabilization
The native soil, or subgrade, must be properly prepared to support your new driveway. Soft, organic soils may require removal and replacement with engineered fill. Clay soils might need stabilization additives to prevent shifting during wet conditions.
Compaction is crucial at this stage – the subgrade should be compacted to at least 95% of maximum density according to engineering standards. This prevents future settling that could crack or damage your new surface.
Phase 2: Base Installation
The base layer provides structural support and helps distribute vehicle loads across the subgrade. Current industry standards recommend a minimum 4-inch compacted base for residential driveways, though heavier vehicles or poor soil conditions may require 6-8 inches.
Material Selection
Most contractors use crushed stone or recycled concrete aggregate for the base layer. The material should be well-graded, meaning it contains a mix of sizes from fine particles to stones up to 1.5 inches in diameter. This gradation allows the material to compact tightly while maintaining good drainage characteristics.
Installation and Compaction
Base material is spread in lifts (layers) of 2-3 inches and compacted with vibratory equipment between each lift. Proper compaction techniques require multiple passes with different roller types:
- Vibratory smooth drum rollers for initial breakdown
- Pneumatic tire rollers for kneading action
- Static steel wheel rollers for final finishing
Phase 3: Surface Installation
The surface installation technique varies significantly by material type, but certain principles apply universally.
Asphalt Installation
Hot mix asphalt must be installed quickly while the material maintains proper temperature for compaction. The ideal laying temperature ranges from 275-300°F, and the material must be compacted before cooling below 185°F.
Modern paving equipment includes:
- Asphalt pavers that spread material to uniform thickness
- Breakdown rollers for initial compaction
- Intermediate rollers for density achievement
- Finish rollers for surface smoothness
The driveway paving process for asphalt typically involves laying the material in one or two lifts, depending on total thickness requirements. Each lift must be properly compacted before placing additional material.
Concrete Installation
Concrete installation requires careful attention to weather conditions and timing. Optimal conditions include temperatures between 50-85°F with low wind and humidity levels that prevent rapid moisture loss.
The process includes:
- Setting forms to contain the concrete
- Placing reinforcement mesh or rebar as specified
- Pouring and screeding the concrete to proper elevation
- Floating and finishing the surface
- Creating control joints to prevent random cracking
- Applying curing compounds to retain moisture
Paver Installation
Paver installation demands precision and attention to detail at every step. The process begins with setting edge restraints to prevent lateral movement, followed by screeding a sand leveling course to exact grade.
Each paver must be placed carefully to maintain proper joint spacing and alignment. Large format pavers, trending in 2025, require specialized handling equipment due to their weight and size. After placement, the entire surface is compacted with a plate compactor and joint sand is swept and vibrated into place.
Phase 4: Finishing and Curing
The final phase varies by material but is critical for achieving optimal performance and longevity.
Asphalt Finishing
Fresh asphalt needs time to cure before accepting vehicle traffic. Foot traffic is typically allowed after 24-48 hours, while vehicles should wait 3-7 days depending on weather conditions and asphalt thickness.
Many contractors recommend waiting 30-90 days before applying sealcoat to allow the asphalt to fully cure. This timing ensures proper adhesion and maximum protection from the sealing product.
Concrete Curing
Concrete requires extended curing time to reach full strength. While the surface may appear dry after 24-48 hours, concrete continues gaining strength for 28 days. Light foot traffic is generally acceptable after 24 hours, but vehicles should wait at least 7 days.
Proper curing involves maintaining moisture in the concrete during this period. Contractors may use curing compounds, wet burlap, or plastic sheeting to prevent rapid moisture loss that can lead to surface cracking.
Paver Finishing
Paver driveways are immediately ready for use after installation, though some settling may occur during the first few weeks. Joint sand may need replenishment after initial use as it works down into the paver system.
Cost Considerations and Budgeting
Material and Installation Costs
Current market data for 2025 shows the following average cost ranges for complete driveway installation:
- Gravel: $1,200-2,400 for a standard 400 sq ft driveway
- Asphalt: $2,800-6,000 for the same area
- Concrete: $2,400-4,800 with basic finish
- Pavers: $4,000-20,000 depending on material selection
These figures include all necessary preparation work, materials, and professional installation. However, costs can vary significantly based on local market conditions, site accessibility, and specific project requirements.
Factors Affecting Project Cost
Several variables can substantially impact your final investment:
Site Conditions:
- Poor soil requiring stabilization adds $2-5 per square foot
- Steep slopes increase labor costs by 15-30%
- Limited access requiring smaller equipment raises prices
- Extensive excavation for drainage systems
Design Complexity:
- Curved driveways cost 15-25% more than straight installations
- Multiple elevation changes require additional grading
- Decorative borders or inlays add $5-15 per linear foot
- Special finishes like stamped concrete increase costs significantly
Timing and Seasonality:
- Peak season (spring through early fall) commands premium pricing
- Winter installation may save 10-15% but limits material options
- Rush jobs typically cost 20-30% more than standard scheduling
Return on Investment
A well-executed driveway project typically adds $5,000-7,000 to your home’s value according to real estate professionals. The actual return depends on several factors:
- Overall home value and neighborhood standards
- Quality of materials and installation
- Design compatibility with existing architecture
- Local market preferences for driveway materials
Premium materials like natural stone pavers may not provide proportional returns in modest neighborhoods, while basic asphalt might appear inadequate for luxury homes.
Maintenance and Longevity
Preventive Maintenance Strategies
Understanding how to pave a driveway includes planning for ongoing maintenance that protects your investment and maximizes lifespan.
Asphalt Maintenance
Regular asphalt maintenance involves:
- Sealcoating every 3-5 years to protect against UV damage and moisture penetration
- Crack sealing to prevent water infiltration and freeze-thaw damage
- Regular cleaning to remove debris and prevent staining
- Snow removal with appropriate tools that won’t damage the surface
Professional sealcoating costs $0.15-0.50 per square foot and can double the lifespan of your asphalt driveway when performed on schedule.
Concrete Care
Concrete driveways require minimal maintenance but benefit from:
- Annual cleaning with appropriate products
- Sealing every 2-3 years in harsh climates
- Prompt repair of cracks to prevent water penetration
- De-icing with concrete-safe products during winter
Paver Maintenance
Paver systems offer the easiest maintenance among paving options:
- Regular sweeping to prevent debris accumulation
- Periodic joint sand replenishment
- Individual paver replacement if damage occurs
- Power washing to restore original appearance
The modular nature of pavers allows for easy utility access and repair without disrupting large areas of the driveway.
Warning Signs and When to Call Professionals
Monitor your driveway for these warning signs that indicate the need for professional attention:
- Surface cracking that extends across multiple areas
- Pooling water that doesn’t drain within 24 hours after rain
- Settling or depression in specific areas
- Edge deterioration where the driveway meets grass or landscaping
- Oil stains that penetrate deeply into the surface
Early intervention typically costs much less than waiting for complete failure. Small cracks can be sealed for $0.10-0.25 per linear foot, while full replacement costs $5-25 per square foot depending on material choice.
Choosing the Right Contractor
Finding the right contractor for your driveway project can feel overwhelming, but it’s one of the most important decisions you’ll make. Research shows that 68% of driveway problems come from poor installation rather than bad materials. This means your contractor choice directly affects whether you’ll love your new driveway or deal with expensive repairs down the road.
Think of hiring a contractor like choosing a surgeon – you want someone with the right skills, experience, and track record. The cheapest option rarely turns out to be the best value when you factor in potential problems and repairs.
What Makes a Contractor Qualified?
Before you even start getting quotes, you need to know what separates the professionals from the weekend warriors. Here’s what to look for when checking out potential contractors:
Licensing and Insurance Requirements
Every legitimate contractor should have proper licensing for your state and local area. This isn’t just paperwork – it means they’ve met minimum requirements and can legally perform the work. Don’t be shy about asking to see their license number and verify it with your state’s licensing board.
Insurance is equally important and protects both you and the workers. Make sure they have:
- General liability insurance covering property damage
- Workers’ compensation for their employees
- Bonding in case they don’t complete the work
Ask for current insurance certificates and call the insurance company to verify coverage. A contractor who hesitates to provide this information should raise immediate red flags.
Local References and Project History
Any contractor worth hiring should have plenty of happy customers in your area. Ask for at least five recent references from the past two years, and actually call them. Don’t just look at photos on their website – those could be from anywhere or even stolen from other companies.
When you call references, ask specific questions:
- How long ago was the work completed?
- Did the project finish on time and on budget?
- How did the contractor handle any problems that came up?
- Would you hire them again?
- Can you drive by and see the completed work?
Pro tip: Drive by some of their recent projects if possible. You can often tell a lot about quality just by looking at the finished product.
Industry Associations and Certifications
Professional contractors often belong to industry groups that require certain standards and continuing education. Look for memberships in organizations like:
- National Asphalt Pavement Association (NAPA)
- American Concrete Pavement Association
- Interlocking Concrete Pavement Institute (ICPI)
- Local Better Business Bureau
These memberships show the contractor takes their profession seriously and stays current with best practices.
Equipment and Crew Size
The contractor should have equipment that matches your project size. A crew with only hand tools probably can’t handle a large driveway properly, while a massive paving company might not give your smaller project the attention it deserves.
Ask about their equipment and crew size. For most residential driveways, you want:
- Proper excavation equipment (mini excavator or skid steer)
- Compaction equipment (plate compactors or rollers)
- Material transport vehicles appropriate for your site access
- Experienced crew members who’ve worked together before
Getting Estimates That Actually Help
Once you’ve identified qualified contractors, it’s time to get estimates. But not all estimates are created equal, and cheap quotes often hide expensive surprises later.
What Should Be Included in Every Estimate
A detailed estimate protects both you and the contractor by clearly outlining expectations. Here’s what every professional estimate should include:
Material Specifications:
- Exact type and grade of asphalt, concrete, or pavers
- Thickness measurements for each layer
- Base material specifications and depth
- Brand names of specific products when relevant
Labor Breakdown:
- Excavation and site prep costs
- Base installation labor
- Surface material installation time and cost
- Finishing work like edging or sealing
Project Timeline:
- Start date (specific, not “sometime in spring”)
- Daily work schedule and crew size
- Weather contingency plans
- Final completion date
Additional Services:
- Debris removal and disposal costs
- Site cleanup responsibilities
- Permit acquisition if needed
- Warranty details for materials and workmanship
Understanding Price Variations
Getting at least three estimates helps you understand fair market pricing for your project. But don’t automatically choose the lowest bidder – there’s usually a reason why one estimate is much cheaper than others.
Common reasons for price differences include:
- Different material quality (cheaper materials cost less upfront but don’t last as long)
- Varying excavation depths (proper depth costs more but prevents future problems)
- Shortcuts in preparation (skipping steps like proper compaction)
- Hidden costs that will show up later as “change orders”
If one estimate is significantly higher or lower than others, ask the contractor to explain the difference. Sometimes the expensive bid includes valuable extras, while the cheap bid might be missing important steps.
Questions to Ask During the Estimate Process
Don’t just accept the written estimate – ask questions to make sure you understand what you’re getting:
About the Work Process:
- How deep will you excavate?
- What type of base material will you use?
- How will you handle drainage issues?
- What happens if you hit unexpected problems like buried utilities?
About Timeline and Weather:
- What time of year is best for this work?
- How long will the project take from start to finish?
- What happens if it rains during installation?
- When can I use my driveway after completion?
About Costs and Payment:
- Are there any potential extra costs not included in this estimate?
- What’s your payment schedule?
- How do you handle changes to the original plan?
- What warranties do you provide?
Warning Signs: Red Flags to Avoid
Unfortunately, not every contractor has your best interests at heart. Some common warning signs can save you from expensive mistakes and headaches.
Financial Red Flags
Demanding Full Payment Upfront: Legitimate contractors don’t need all their money before starting work. A reasonable payment schedule might be 10% down, 40% when materials are delivered, 40% when work is substantially complete, and 10% after final inspection. Anyone asking for 100% upfront is either desperate for cash or planning to disappear.
Prices Too Good to Be True: If one bid is dramatically lower than others, there’s probably a catch. Common ways contractors cut costs include:
- Using inferior materials
- Skipping important preparation steps
- Planning to add expensive “change orders” later
- Not including permits or disposal costs
Cash-Only Deals: Contractors who only accept cash often aren’t paying proper taxes or insurance. You’ll have no paper trail if something goes wrong, and your homeowner’s insurance might not cover work done by uninsured contractors.
Communication Red Flags
Pressure Tactics: Good contractors don’t need to pressure you into signing immediately. Be suspicious of anyone who says:
- “This price is only good if you sign today”
- “I happen to be in your neighborhood” (door-to-door sales)
- “I have leftover materials from another job”
- “You need this work done immediately or your driveway will fail”
Verbal-Only Estimates: Professional contractors provide written estimates with details about materials, labor, and timeline. Verbal estimates lead to misunderstandings and disputes later.
Poor Communication: If a contractor doesn’t return calls promptly during the sales process, they probably won’t communicate well during the actual work either. You want someone who explains things clearly and keeps you informed throughout the project.
Professional Red Flags
No Fixed Business Address: Contractors operating out of trucks or P.O. boxes are harder to track down if problems arise. Look for companies with established local offices and phone numbers.
No Local References: Contractors who can’t provide local references might be new to the area or have a history of unhappy customers. Out-of-state references are difficult to verify and don’t tell you how they perform in your local climate.
Missing Licenses or Insurance: Never hire a contractor who can’t prove they’re properly licensed and insured. You could be liable for injuries or property damage if something goes wrong.
Making Your Final Decision
After gathering estimates and checking references, trust your instincts along with the facts. The best contractor combines competitive pricing with clear communication, proper credentials, and a track record of satisfied customers.
Remember that your driveway will be the first thing people see when they visit your home. Investing in quality installation from a reputable contractor protects your investment and gives you peace of mind for years to come.
The bottom line: Don’t let price be your only deciding factor. The difference between a good contractor and a great one might only be a few hundred dollars, but the difference in results can last for decades.
Environmental Considerations and Future Trends
Sustainable Paving Options
Environmental consciousness is driving innovation in driveway materials and installation techniques. Permeable paving systems are gaining popularity as communities implement stormwater management requirements.
Permeable Solutions
Modern permeable options include:
- Porous asphalt that allows water infiltration while maintaining structural integrity
- Permeable concrete with specialized mix designs that promote drainage
- Permeable pavers with wide joints filled with gravel or grass
- Grid systems that support vegetation while providing vehicle access
These systems reduce runoff by 30-70% compared to traditional impermeable surfaces, helping prevent flooding and protecting local water quality.
Recycled Materials
The paving industry increasingly incorporates recycled content:
- Recycled asphalt pavement (RAP) can comprise 20-50% of new asphalt mixes
- Recycled concrete aggregate provides excellent base material
- Rubber-modified asphalt uses recycled tire rubber for improved flexibility
Technology Integration
Smart driveway technologies emerging in 2025 include:
- Heated paving systems that eliminate snow and ice
- LED lighting integrated into paver joints
- Sensors that monitor surface conditions
- Electric vehicle charging integration during installation
While these features add significant cost, they represent the future of residential paving and may become standard in luxury markets.
Making Your Driveway Paving Decision
Successfully completing a driveway paving project requires careful planning, quality materials, and professional execution. Understanding how to pave a driveway empowers you to make informed decisions about materials, contractors, and timing that will serve your needs for decades to come.
The driveway paving process involves much more than simply laying new material over an existing surface. From initial site assessment through final curing, each step influences the long-term performance and appearance of your investment.
Modern installation techniques and materials offer homeowners more options than ever before, whether you prioritize durability, aesthetics, or environmental responsibility.
Whether you choose asphalt for its flexibility and value, concrete for its longevity, or pavers for their premium appearance, proper installation and maintenance will ensure your new driveway enhances your property’s value and curb appeal for years to come.
Ready to Start Your Driveway Project?
When you’re ready to transform your property with a professional driveway installation, contact Panda Pavers for expert consultation and quality craftsmanship that exceeds your expectations. Our experienced team specializes in all types of paving solutions and can help you select the perfect option for your specific needs and budget.